People occasionally ask about what camera I use or think is best. I don’t obsess about my gear or about getting newest and latest gear. For me, my gear is a tool and nothing more. Simply put, here are my thoughts on camera equipment.
- The most important thing in photography it being able to see, to visualize the image you want along with developing the skill of know how to achieve it. The camera equipment is the least important in this process.
- There is no “best” in equipment selection. There is only “best for me”. You have to analyze your needs and find the gear that works best for you. What works best for me may not be best for you.
- I want gear that is reliable and is going to last. I want to focus on my photography and not be continually looking for new gear.
- My gear should never be a limiting factor or a reason I couldn’t get the shot. I want to “kick away the crutches” and not have the capability of using my gear as an excuse for a bad photo or not getting the shot. If the photo is bad, it’s all on me and only me.
Ok, so if you still want to know what gear I use it’s listed below. I should note that I do not receive any compensation in any form from any of these vendors.
Camera
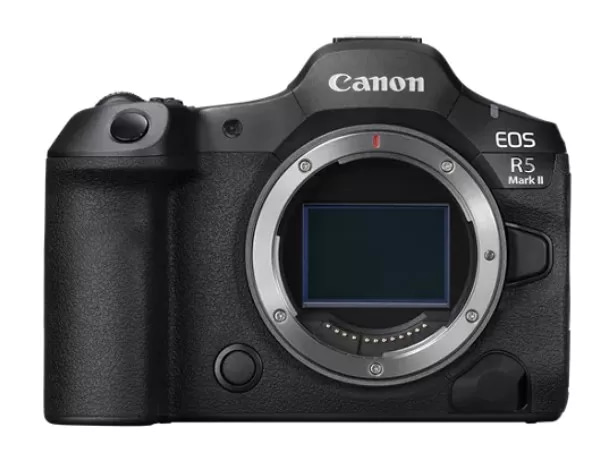
Canon R5 Mark II

In March, 2025 I made the switch to a mirrorless by getting a Canon R5 Mark II. It’s a nice step up from the Canon 5D Mark III with more dynamic range, twice the resolution (45 megapixels), and IBIS (in-body image stabilization). I’ve explained my decision process in a blog post that covers this in detail. For the time being, I will continue to use my EF lenses using a Control Ring Mount Adapter EF-EOS R.
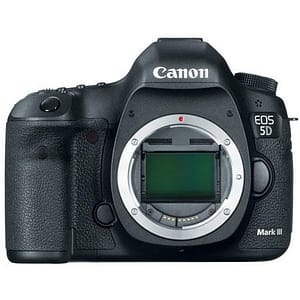
Canon 5D Mark III

My previous everyday camera was a Canon 5D Mark III that I bought it in 2013. I did my research before deciding on this camera and have been very happy with my choice. It’s been a great camera and I like it quite a bit. The camera is over 10 years old and still performs wonderfully.
The 5D is a full frame camera with 22 megapixels that holds it own against newer cameras. One downside is the size and weight, nearly 2 pounds (body only). But for me and my style of shooting, those considerations are secondary to the image quality it provides.
With the purchase of a Canon R5 Mark II the 5D Mark II is officially semi-retired. I say “semi” since I’m holding onto it and thinking of having it converted to a full-spectrum IR (infrared) camera.
Lenses
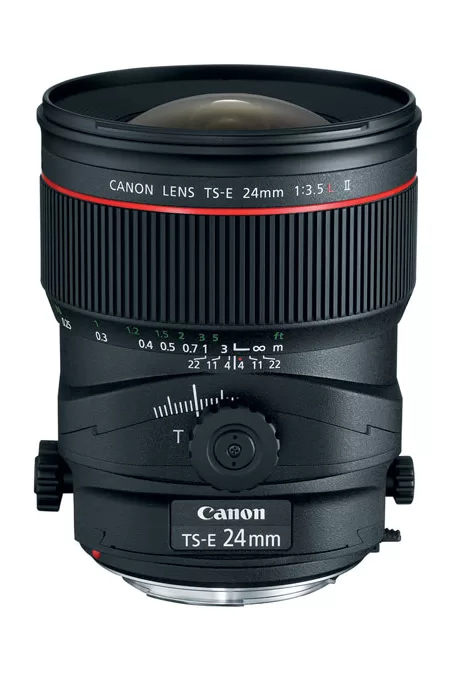
Canon TS-E 24mm f/3.5L II Tilt-Shift Lens

The Canon TS-E 24mm f/3.5L II Tilt-Shift Lens is my absolute favorite lens. It is super sharp and a great high-quality lens. Tilt-shifts are often pigeonholed as merely an “architectural” lens. It is true that they are well suited for architectural work because they can control the perspective to keep buildings from appearing to be leaning backwards. But that’s not all they do. The tilt function allows you to control depth-of-field in ways a “normal” lens simply cannot do. You can also use the shift function to create high-resolution panorama photos without distortion.
Canon EF 24-105mm f/4L IS USM Lens

The Canon EF 24-105mm f/4L IS USM Lens is my “walking around lens”. It’s a very versatile lens with a focal range well suited for my needs as I don’t do a lot of long focal length shots. This lens has the reputation of being the least sharp of the “L” lenses. That doesn’t mean that it isn’t sharp, it is. It just means it may not be as sharp as the rest of the L lens family. I guess it is a little like complaining your Ferrari is the slowest model of Ferrari.
Canon EF 14mm f/2.8L II USM Lens

The Canon EF 14mm f/2.8L II USM Lens is a wonderful ultra-wide angle lens. When I first started out in photography eons ago, I thought wide angle lenses were what I needed for landscape photography. I quickly found out that wasn’t exactly correct. I was disappointed to discover that wonderful scene I shot was so tiny in the image. Turns out wide angles lenses really work best for close-in shots where you want to be close to your subject and still get the surrounding environment.
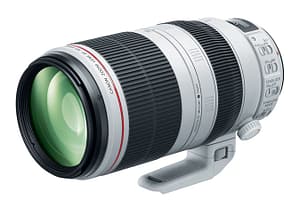
Canon EF 100-400mm F4.5-5.6L IS II USM Lens

The Canon EF 100-400mm F4.5-5.6L IS II USM Lens is probably my least used lens. It’s a good lens but it’s just that I don’t do a lot of shooting in that focal length range.
Tripods and Heads
Robus RC-5570 Vantage Series 3 Carbon Fiber Tripod
Because I wanted a sturdier and taller tripod I purchased a Robus RC-5570 Vantage Series 3 Carbon Fiber Tripod. The RC-5570 give me 70 inches of height with no center column. I never use a center column on a tripod as it adds instability which defeats the purpose of the tripod. This is a very rugged and sturdy tripod. It simply dwarfs the the Induro AT013. The major downside for the RC-5570 is the weight, 5.6 pounds. As a result of having these various options, I can tailor my choice to the type of shooting and the location. The RC-5570 isn’t cheap but I was fortunate to be able to buy this used at a considerable savings.
Desmond Tri-Wheel Tripod Leveling Base with 3 Bubble Levels with a Benro GD3WH 3-Way Geared Head

I wasn’t happy with the ball head in terms of precise leveling so I added this combination of tri-wheel leveling base and a geared head. The tri-wheel gives me the ability to do precise leveling. The same is true with the geared head. I really like the simple precision of it. The only downside is I had to add a spacer between the geared head and the leveling base to give enough distance for the adjustments knobs on the head to clear some parts of the leveling base. In many cases I could do without the leveling base, opting to level with just the geared head. That approach works fine as long as you don’t rotate the head as you would then have to re-level it. This way I have options.
Induro AT013 Tripod with a Induro BHL3 Tripod Head
The Induro AT013 Tripod with the BHL3 ball head are a great basic combination that balance weight and sturdiness. The drawbacks were that the height is okay at 45 inches (without the center column) but not great. Likewise, the ball head was sturdy but difficult to get precise level adjustments which are critical in architectural shots. The other nice thing about this combination is the overall small size which comes in handy while travelling. The tripod (without the head) will fit in a carry-on size suitcase and the head itself doesn’t take up a lot of space either.
Editing Hardware and Software
BenQ SW2700PT Monitor

Once you’ve taken the image you want to be able to edit in to create an image that others will enjoy. To do this you need a sharp monitor with accurate color rendition. Otherwise, you’ll end up with image that look great on your monitor but off-color on other people’s monitors and with prints that don’t match your monitor. Although you cannot control the color settings on other people’s monitors you can at least edit to a known standard which hopefully others also use for their monitors.
The SW2700PT is a 27 inch 16:9 monitor designed for photography editing. It’s a bit pricey but well worth the investment if you want to up your editing game. I’m extremely happy with it and I think you will be too.
Wacom Intuos Creative Pen Tablet (Small, Black, CTL4100)

Wacom tablets are a great input device that lets you take advantage of all the features of Photoshop such as some of the brush properties. As an input device it works in the simplest fashion as a mouse. But that’s not where it’s strength is. For routine, simple action a mouse is arguably more efficient and easier. The Wacom tablet allows you to access such features as pressure sensitivity, angle jitter and size jitter among others that you cannot access with a mouse.
Don’t spend the money to get a large tablet. You probably don’t need a large one; it costs more and takes up a lot of space. The CTL4100 measure only 7.9″ X 6.3″. In all but the most serious editing situations, a small tablet works fine.
Adobe Creative Cloud

Having the right gear is only part of the process. You also have to have the right editing software. The bulk of my editing work is done with the Lightroom and Photoshop components of Adobe Creative Cloud Photography Plan. Lightroom has a lot of good editing features and a nice cataloging capability. It’s my starting point for all my photos. There are times when all of my editing is done in Lightroom. For more involved editing, using layers etc., Photoshop is the “go to” program.
Photoshop has amazing capabilities and it can be difficult to remember it all. No matter what you want to do and can’t figure out, a lot of people have already faced that same problem and have figured it out. Fortunately, many of them share the answers. Because they share, the only thing you need to remember is that Google is your friend. I can’t count the number of times I’ve googled “How do I do XYZ in Photoshop?” Since I use Lightroom and Photoshop extensively I find it useful to be on the Adobe Creative Cloud Photography Plan. The plan provides regular updates as new features are added along with any bug fixes.
Topaz Photo AI

I wasn’t satisfied with the noise reduction and sharpening options in Lightroom and Photoshop so after investigating I decided to go with Topaz Photo AI. It does a phenomenal job with both noise reduction and sharpening. I would caution you to use it with care. Personally, I find the initial settings for noise reduction and sharpening are often too high. It tends to “overcook” the image creating strange and unwanted artifact. Since I don’t believe in blindly accepting any suggested editing setting I just turn both down (sometimes significantly) and still get excellent result. Topaz Photo AI also has an upscaling option which seems to work very well also.
Miscellaneous Gear
Formatt Hitech 100mm Firecrest Ultra Joel Tjintjelaar Signature Edition Long Exposure Filter Kit #1

I decided to make the jump to a filter “system” for my neutral density (ND) filters because I wanted to try doing some “fine art” long exposure architectural photography. After doing my research I settled on the Formatt Hitech 100mm Firecrest Ultra Joel Tjintjelaar Signature Edition Long Exposure Filter Kit #1. The kit includes a 3-stop, 6-stop, and a 10-stop, 100mm square ND filters and a circular polarizing filter. I also added a Formatt Hitech 1-stop and 2-stop circular ND filters. As a result, I can get just about any level of density that I require. With a couple of inexpensive step-up rings I’m able to add the filters to all of my lenses with the exception of the 14 ultra-wide angle. It’s a great filter system, sturdy and easy to use.
