Unity Of Houston
In my last post I talked about the perseverance and patience it took to get my Unity of Houston photos. I said I would be posting the actual photos this week and here they are. Unity of Houston is a non-denominational church in Houston. The church’s architecture is very unique and non-traditional. As a result, I wanted a non-traditional photo to highlight the unique design.
To accomplish that goal, I chose to go with long exposure black and white shots in the “fine art” style. On a side note, I wish they would come up with a better name than “fine art”. Self-labeling your own photos as “fine art” just seems so pretentious don’t you think?
The Detail Shot – Unity of Houston #1
The first shot I took was a detail view looking skyward up the glass spine of the building. This spine is the centerpiece of the architectural design and is the first thing that captures your interest.
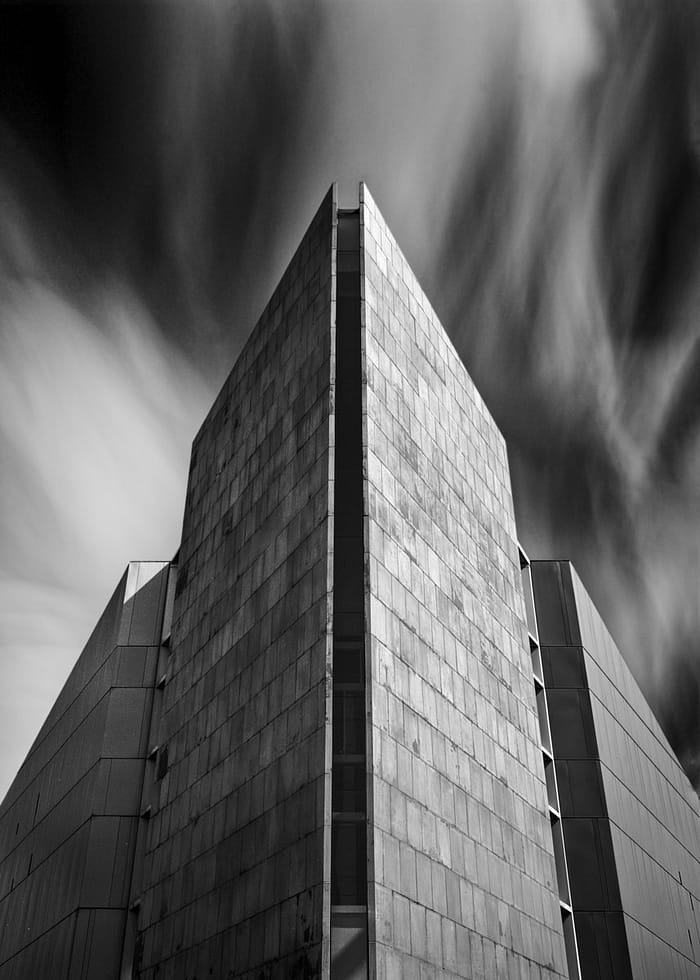

– The Composition And Taking The Shot
I set my camera on a tripod about 50 feet from the spine with the camera pointed up at a severe angle. I deliberately did not include the whole façade as I wanted to concentrate on most important part and exclude the entryway cover etc. However, I did compose it to be symmetrical
I am currently on the run from the architectural police as the vertical elements are not shown as being truly vertical. This was an intentional and is a break from the tyranny of the rules. Although I did look at a version with true verticals, I prefer the as-shot version. For me, it seems more imposing and better conveys the sense of how close to the building I was when taking this shot. Because the tilt is so significant it clearly indicates it was intentional and not an oversight.
The gear and settings were:
- Canon 5D Mk III, Canon EF24-105mm f/4L IS USM lens at 32mm controlled by a CamFi Pro PLUS Wi-Fi Remote Control
- 326 seconds at f/9, ISO 100 with 16-stops of ND filters
- Robus RC-5570 Vantage Series 3 Carbon Fiber Tripod with Desmond Tri-Wheel Tripod Leveling Base and Benro GD3WH 3-Way Geared Head
The Post-Processing
Post-processing started in Adobe Lightroom (LR). In LR I removed dust and sensor spots and fine-tuned the level and symmetry of the composition. This gave me a cleaning starting point for processing the image in Adobe Photoshop (PS).
The first steps in PS were also preparatory in nature. These included adjusting the saturation of the blue sky to make it darker when converting to black and white. I also did a global curves adjustment to rough bring the tone and exposure to the desired point. The last step before the black and white conversion was to select the glass spine and to increase the exposure to bring out a hint of detail in this heavily shadowed area. While still in color I created and saved a number of selection channels for the various wall sections and sky. This could be done at any point but I find it easier to do from a color layer. The selections would be used in the fine-tuning of exposure, tone and texture in future steps.
Using Nik Silver EFEX I converted the image to black and white using the Low Key 1 preset. Within Silver EFEX I made some adjustments to exposure and also tone by adjusting the underlying color effects.
Taking the photo back to PS I began the detailed post-processing. This includes local adjustments using the previously created selections. I also created a copy of the working layer and increased its exposure. Using the selections and these two layers I applied a gradient tool the control the light effect in each area. As you might expect there was also a lot of back and forth and tweaking of various adjustments. Lastly, I used a bit of gaussian blur and the sky to give it a smoother feel and reduce the grain.
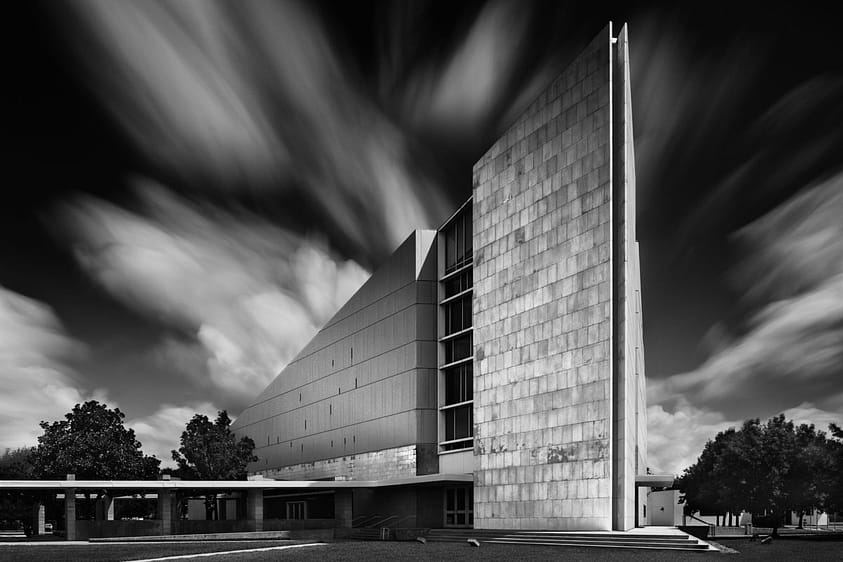
The Big Picture – Unity of Houston #2
For my second shot I chose a more conventional composition. Basically, I backed away from the building to capture the entire structure but trying to still emphasize the spine as the focal point. Although the composition is conventional, I decided to continue with the non-standard processing of long exposure black and white.
In this case, the architectural police are happy as I made sure the vertical elements were truly vertical.

The gear and settings for the second image are similar but not identical to the first. Specifically, they were:
- Canon 5D Mk III, Canon TS-E24mm f3.5L tilt-shift lens with a 11mm upward shift, controlled by a CamFi Pro PLUS Wi-Fi Remote Control
- 331 seconds at f/9, ISO 100 with 16-stops of ND filters
- Robus RC-5570 Vantage Series 3 Carbon Fiber Tripod with Desmond Tri-Wheel Tripod Leveling Base and Benro GD3WH 3-Way Geared Head
The use of the tilt-shift lens gave me a wide-angle view and the ability to control perspective in-camera. I also love how sharp the lens is.
Post-Processing The Second Image
The post-processing was essentially the same process that I used in the first image. The most significant difference in the second image is that I used selections and gradient tool adjustments much more extensively. This was because I had more places that I wanted to carefully adjust the light and tonal qualities.
The Final Tally
In the previous post I estimated that the time spent on travel (4 trips) and actually taking shots totaled about 10 hours. Now that I’ve processed the images, I estimate the total time is roughly 14 hours invested. That’s 7 hours per image which is quite a lot. But I’m okay with that as I was able to get the results I wanted.
Leave A Comment And Share
I’d love to hear your comments and feedback on this post. I hope it was helpful. What’s the longest time start to finish that you’ve spent on a photo? Please leave a comment in the comment box below.
Also, if you like this post please share on Facebook and Twitter.