Using Custom Shooting Modes
There is a frequently used acronym in the military that can also serve as a good reminder for photographers before they go out shooting. The acronym is RTB which means “return to base”. Come back to where you started; come back home. Metaphorically we need to return to base before we use our camera; something custom shooting modes makes easy. What this means for a photographer is to have your camera ready with the settings that you know, understand and are right for type of shooting you have planned. It’s your comfort space, your “home”.
Choices, Choices, Choices
Modern cameras have a tremendous number of settings. My camera, a Canon 5D Mk III, has 21 top level menus! Beyond that there are sub-menus. I haven’t tried to count all the possible setting choices but it has to be in the 100+range. It’s hard to imagine all the possible combinations. While your camera may not have as many choices (and some may have more) I’m sure you’ll still find that you have a lot of settings from which to choose.
Having all these settings gives us a great deal of control and flexibility in using our camera in a way to get the desired results. It also presents a risk. What if we unknowingly keep a setting we needed in a previous shoot but it is wrong for what we now want to achieve? You could easily ruin a whole days effort by using settings from a previous outing.
Resetting Your Camera To A Base Configuration
The way to prevent issues caused by forgetting a setting you don’t use often is to get in the habit of resetting your camera to a base configuration of your choice before you go out shooting. You may want to be extra cautious and also do it at the end of your shoot. This goes beyond the annual review of your gear. It should be a habit, a routine, that you perform each and every time before you go out shooting.
You can do this manually. Simply go through all of the menus, checking the settings and resetting them as needed to your base configuration. This isn’t difficult but it is time consuming and you could easily miss a needed change.
Custom Shooting Modes
 This is where custom shooting modes come in. Many cameras allow you to store one or more custom shooting modes. These store all your camera settings and allow you to return to a known configuration by a quick turn of the Mode Dial. This is a much easier and faster way of resetting your camera than manually checking everything. It also keeps you from overlooking any settings. You can think of custom shooting modes as a “preset” for your camera. Just like the software presets in your post-processing; they are a known starting point. From that known starting point you can change the settings as desired.
Custom shooting modes increase your odds of getting a successful shot in situations where you unexpectedly have a short lived photo opportunity and don’t have time to manually change all the appropriate settings. In those situations the custom settings mode may not have the perfect settings but at least they give you a reasonable chance at not missing a good photo opportunity.
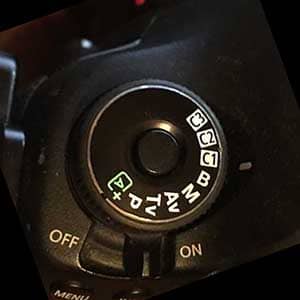
Setting Up Your Custom Shooting Modes
You camera manual is the best source on how to set your custom shooting modes. But is is very easy to do. For a Canon a very simplified explanation is:
Configure your settings then via the menu – Custom Shooting Modes> Register settings> Select mode (C1, C2, C3)> Press Set> Press Ok
It doesn’t get much easier than that. Brands other than Canon will likely have a similar way of setting your custom shooting modes.
How I Use My Custom Shooting Modes
Most of my shooting is outdoors with static scenes such as landscapes and architecture. I also like street photography and on occasion will bracket my shots to use in HDR processing. For these I’ve set up my custom shooting modes as follows:
- C1 – for landscape and architecture. Low ISO, small aperture but still in the sweet spot. This is my base, my “home”.
- C2 – for street photography, Auto ISO – but limited range, higher shutter speed, more open aperture.
- C3 – for bracketing exposure, set at 5 shots at +/- 2/3, 1-1/3 brackets, high speed continuous shooting.
I’ve listed some of the more significant settings for all 3 of my custom modes in the table below. There are too many to list all of the settings. The settings different from my base C1 mode are highlighted in blue. These 3 settings are just examples of how you can use this feature. Make your custom shooting modes tailored to what is the way you use your camera and for what type of photography you do.
| Custom Shooting Mode | C1 | C2 | C3 |
| Configuration | Base | Alternate 2 | Alternate 3 |
| Use | Outdoor static scenes, e.g. landscapes | Outdoor dynamic shots little time to set up e.g. Street shots | Exposure bracketing / HDR |
| Shooting Mode | Manual | Av - Aperture Priority | Manual |
| Aperture | f/11 | f/5.6 | f/11 |
| Shutter Speed | 1/125 sec | Auto | 1/125 sec |
| ISO | 100 | Auto | 100 |
| Auto ISO Range * | 100 - 25600 | 100 - 6400 | 100 - 25600 |
| Min. Shutter Speed * | 1/125 sec | 1/125 sec | 1/125 sec |
| Drive Mode | Single | Single | High Speed Continuous |
| Number of Bracketed Shots * | 5 | 5 | 5 |
| Auto Exposure Bracketing | 0 | 0 | +/- 2/3, 1-1/3 |
| Exposure Increments * | 1/3 | 1/3 | 1/3 |
| Metering | Spot | Evaluative | Spot |
| Auto Focus Area | Spot | Surround | Spot |
| Focus Spot | Center | Center | Center |
| Exposure Compensation | 0 | 0 | 0 |
| Image Quality | RAW | RAW | RAW |
| White Balance | Auto | Auto | Auto |
| Picture Style | Neutral | Neutral | Neutral |
| * Although a value is set it may not function depending on other choices | |||
Don’t Forget Your Lenses
Are you saying I need to reset my lenses too? That’s exactly what I’m saying.
If you use a tripod and are meticulous you know to turn off image stabilization and auto-focus after setting your focus. This is done to avoid vibration movement in the lens from focus seeking and image stabilization that can affect sharpness. It is good practice to always turn them back on as soon as you take the camera off of the tripod. Otherwise, you may be in for a surprise the next time you use that lens. Some of the newer cameras may have image stabilization in-camera and perhaps auto-focus too. If you have one of these cameras you should be able to include these settings in your custom shooting modes.
Don’t Forget The Lens Filters
Remove any lens filters immediately after you’re done using them. I’ve learned this the hard way. One day after carefully setting up and leveling my tripod I put the camera on ready to take a shot. I removed the lens cap and looked through the viewfinder and could see nothing. There seemed to be no normal exposure setting that worked. I took a shot approximating the settings that should work but it came back with a screen that was blank. The histogram straight lined to the left. Dejected I packed up my gear thinking about how much this was going to cost me to get fixed. As I put the camera back in the car, I looked down and noticed I had left a 10-stop ND filter on the lens. Doh!
A rather time consuming and embarrassing mistake that could have been easily avoided if I had simply put the ND filter away when done shooting. On the bright side at least I remembered to take off the lens cap!
How do you use custom shooting modes? Please leave a comment in the comment box below.