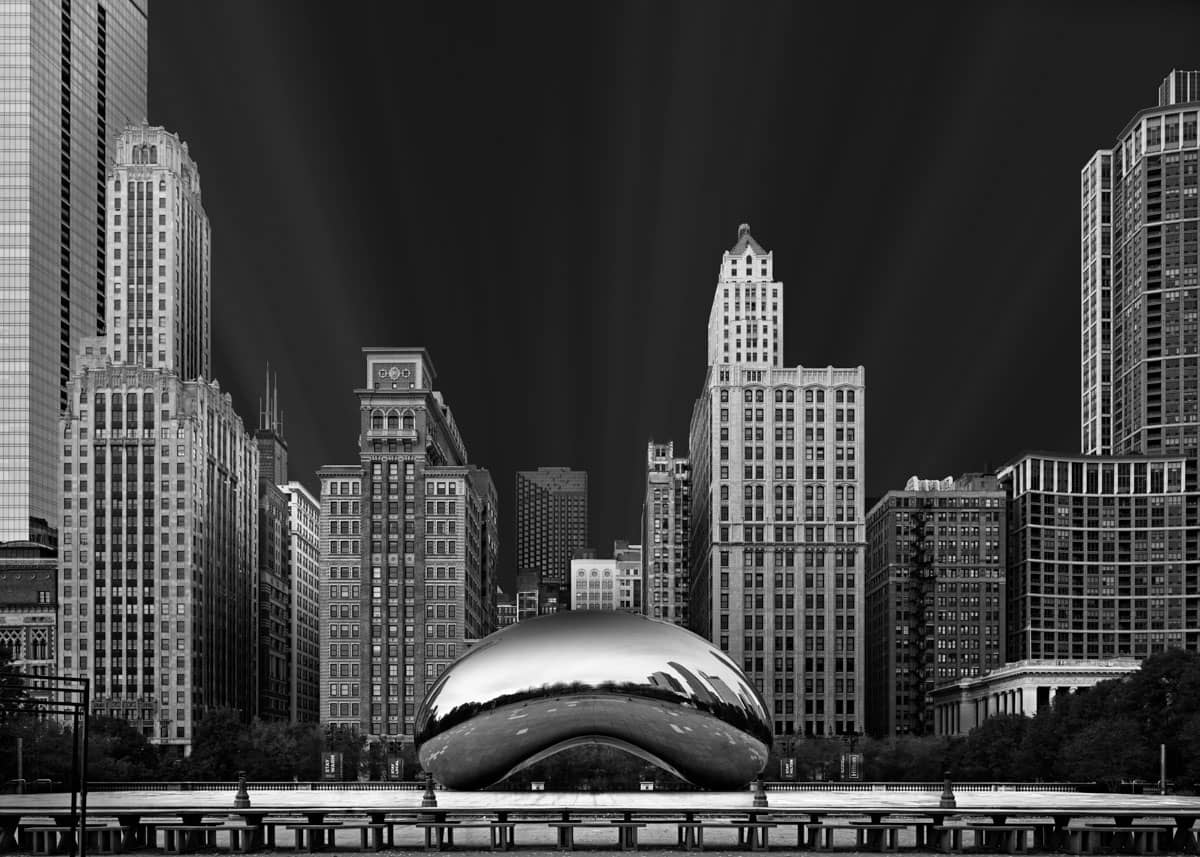
Cloud Gate – “The Bean”
When photographing an iconic structure, it is very difficult to come up with an original composition. For example, just about any possible composition for the Eiffel Tower has already been done. But we make our photos anyway. Even though we weren’t the first it is a way of saying, “I was there and this is my image”. Somethings are so beautiful and iconic they just beg to be photographed over and over. The Cloud Gate (aka “The Bean”) sculpture in Chicago’s Millennium Park is one such place. It may not have the history and stature of the Eiffel Tower but it calls to us nonetheless. So, this is my take on “The Bean”.
I wanted to achieve a number of things with my photo of Cloud Gate:
- A long exposure to do 3 things
- Produce a lone streaky cloud effect.
- Create a nice lighting effect without hard shadows
- Make the people disappear to starkly show the sculpture to emphasize its size in relation to the surrounding buildings
- Produce a “fine art” black and white to emphasize the light and contrasts as that is how I saw the scene.
- Emphasize not only the sculpture but also the beautiful street wall of Michigan Avenue behind Cloud Gate.

(Click to enlarge/purchase)
The Composition
I chose a straight on composition since that fulfilled my desire to show the size of Cloud Gate in comparison to the buildings behind it. This also fulfilled my goal of emphasizing the beautiful street wall of Michigan Avenue.
Another interesting composition is looking diagonally across the sculpture from the southeast toward the northwest and the Crain Communications Building. The building’s striped and slanted façade is striking. However, it didn’t really help with my objectives and I felt that this individual build would be competing with Cloud Gate as the subject. Photography is all about making choices.
Taking The Shot
I set my camera on a tripod in a pathway leading to the sculpture which allowed me to center it on Cloud Gate.
The gear and settings were:
- Canon 5D Mk III, Canon TS-E 24mm f/3.5L II Tilt-Shift Lens with some vertical shift, Induro AT013 tripod, Induro BHL3 tripod head, Shutter Release Cable, 14-stops of neutral density filters (combination of a 10, 3 and a 1-stop ND filters)
- 362 seconds at f/8, ISO 100, mirror lockup setting used to minimize vibration
As I always do in these types of shots, I used mirror lockup and a shutter release cable. These may be small details; however, I like to do everything I can do to get a good image. The effort required is minimal. So why not do all that can be done to get a good shot?
Post-Processing
Composing and taking the shot are both straightforward and relatively simple. The bulk of the hard work in producing this image comes in the post-processing phase. However, I feel the end result is worth the effort.
Making The People Disappear
I arrived at Millennium Park early in the morning at opening time. Despite the early hour, there were still 20+ people milling around the sculpture at the time I took the photo. The 362 second exposure time removed most of the people from the photo with no particular processing required. However, there were still some fragments of people who did not move around much during that time period. These I removed through combinations of every people removal technique I could think of:
- clone stamping
- using the spot healing brush
- median stack mode blending
- layer masking with multiple versions of the image
I even used dodging to reduce some shadow artifacts of people.
The Clouds
The night before the shoot the cloud forecast for the next morning indicated about 40% cloud coverage. This was close to the ideal 35% coverage so I was hopeful of getting a nice cloud effect. I know you’ll be shocked to hear that a weather forecast can be wrong; but it can; and it was. Since this was my only opportunity to shoot the scene, I had to do some enhancement in photoshop.
Processing The Light
This is where all the heavy lifting starts. My aim was to use the light to emphasize various aspect. I wanted to do this in a way that took into account the direction of the light (from behind me) and also had the light fading away as you go deeper in to the canyons of the city or lower down towards street level. The quick answer is that you do this with masking selections for every façade you want to do this on. You then adjust the light with layer masking of different exposures using the Photoshop gradient tool.
Making The Selections In Photoshop
Start your selection at a point you know you can get a good, precise selection. Once you have that, make an adjoining selection. Photoshop’s Object Selection Tool is very useful in making selections but you may still need to tweak them with the Select and Mask tool. Once you have the second selection made use the Lasso selection tool (or Polygonal Lasso tool) set on “Add to Selection” and expand the selection where it shares an edge with other selections. Make it overlap. Next, load the adjacent selections using the “Subtract from selection” setting. This will remove the overlap areas but more importantly it will ensure sure that all selections that share edges truly have the same shared edge. This very important, otherwise you will likely have “holes” between the two selection that belong to neither selection and end up with noticeably strange light in them.
In this image every building façade was a separate selection. In addition, there were selections for the sky, the plaza, the Bean itself, and even one for the sky reflection in the Bean. This was nearly 30 selections in all. It can be tedious work.
Things To Consider With Your Selections
Photoshop stores selections as “channels”. I like to keep these channels in my image in case I need to make further adjustments. There are however, a couple of things to keep in mind if you choose to go that route. First, each selection increases the overall file size. For this image the selection for the sky came in at 38MB. So, your overall file size can quickly get quite large which can impact computer performance. Second, there is a limit to how many selections or channels you can have. Photoshop has a limit of 56 channels in an image. Once you hit that limit it won’t allow you to save anymore selections. It won’t give you an error message or warning. It simply doesn’t save them beyond 56 channels.
Controlling The Light With The Gradient Tool And Layer Masks
Once you’ve made your selections you can start to make the light adjustments. After you’ve completed your processing in the normal manner create 2 copies of the as layer copies in Photoshop. Adjust one copy to be overexposed and one copy to be underexposed. These don’t have to be extreme, just the ends of the range of light you want to use. The original is the mid-point. The steps for creating a fall-off in light are:
- Determine which the two layers that you want to use. For example: overexposed and mid-point, overexposed and underexposed or mid-point and underexposed
- Make additional copies with the brighter one on top of the darker one. Select the brighter layer.
- Create a layer mask on the brighter layer and click on it.
- Load the selection in which you want to adjust the light
- Using a gradient tool (linear gradient is used most often) and click where you want the transition to begin; drag it in the direction you want for the light and release at the point you want the transition to end.
- Repeat the process for each segment selection.
This is the basic process. Once you are familiar with it you can adjust it for whatever situation you want to address. For this photo I went through this process for each of the nearly 30 selections I created giving me the ability to control the lighting at Cloud Gate as I wanted.
Please Leave A Comment And Share
If you liked this post please share on Facebook and Twitter and comment below. What techniques do you use to control light in your images? Please leave a comment in the comment box below.