Church In Ruin
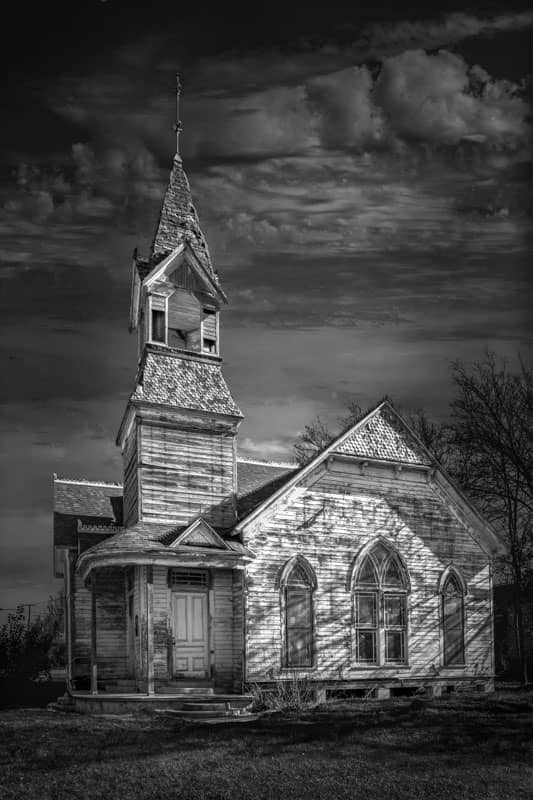
Through a friend I learned of a beautiful old church in ruin. It wasn’t abandoned but was no longer an active church; and it was slowly deteriorating. Its character, however, wasn’t diminished by the relentless process of aging. The church stands tall and proud as if waiting for its members to return for worship services.
The charm of this place was unmistakable. The bell tower, still tall and straight though lacking a bell, reached above the surrounding area to proclaim that the church was still there. Missing siding boards and sorely in need of paint the beautiful smaller details still had their magic. The wonderfully ornate lightning rod topping the steeple, the roof ridge ornamentation and the large arching windows were reminders of what it once must have been. Despite its glimpses of beauty and charm there is no question that at over 120 years old, age had exacted its toll.
I’ve been there a number of times to try to capture the beauty and character of this church in ruin. I never seemed to be able to catch it at a time when the clouds provided a wonderfully dramatic background. Who knows, maybe the church didn’t want them, feeling that I should take it as it stands, old but still beautiful.

(Click to enlarge/purchase)
The Composition
There were not a whole lot of options in terms of composing this style of shot. The available sightlines given the location and the vegetation essentially dictated this point of view.
Taking The Shot
The gear and settings for this shot were:
- Canon 5D Mk III, Canon TS-E 24mm f/3.5L II Tilt-Shift Lens, Induro AT013 tripod, Induro BHL3 tripod head, Shutter Release Cable. I believe I applied some vertical shift but didn’t record the amount.
- 1/60 seconds at f/20, ISO 100, mirror lockup setting used to minimize vibration
I try to use mirror lockup and a shutter release cable in situations like this to do everything I can do to get a good image. I know many may feel this is an unnecessary step but the effort is minimal so why not do all that can be done?
Post-Processing
Starting in Adobe Lightroom I made minor adjustments to the perspective to true-up the vertical elements. I also used the “auto” setting in the Basic panel as a starting point. I checked and set the white and black points to remove clipping of highlights. Finally, I did a preliminary scan and cleaned up any dust or sensor spots.
From Lightroom I took this into Photoshop where the fun really began. There was not a lot of color in the image. The only significant color was the blue sky and the green grass. The “auto” setting in Lightroom had darkened the sky which I thought would look good in black and white providing a nice darker background for contrast. It also darkened the grass. I converted the photo to B&W using the Nik Silver Efex. Within Silver Efex I lightened the grass a bit using a color filter and also did some basic contrast and highlight adjustments. However, I saved most of the contrast and highlight adjustment for Photoshop.
After completing the B&W conversion the contrasts, textures, shadows and highlights needed attention. I had a full dynamic range. There were a lot of shadow areas plus the dark sky. On the right side of the histogram, I could see the possibility of blown highlights as there was direct sunlight on the white siding and silver roof ridge ornamentation. I went back to Lightroom and used the brush and radial filters to tone down highlights and bring out shadows. I also adjusted contrast and texture which necessitated further shadow and highlight adjustments. This turned out to be a very iterative process. I also added a slight vignette to help focus attention on the church.
The Need For Clouds
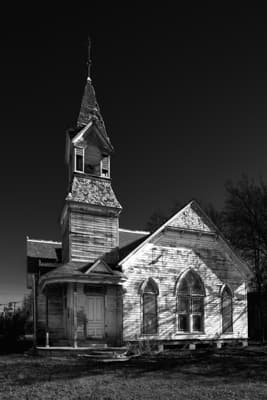

Going back to photoshop I made larger adjustment by using layer masks for the entire church. I used levels to brighten the appearance of the church as a whole relative to the background without blowing highlights again. After a final check for sensor spots, I was finished. Or was I?
At this point, I had achieved what I set out to do. I had the attention on the church and it contrasted nicely against the dark, cloudless sky. It turned out to be an okay image. But that was the problem, it was just okay. The more I thought about it, the more it became apparent I needed some clouds.
With Photoshop’s new Sky Replacement tool, it now seems to be the popular thing to change out the sky in photos. The problem I had was that all my processing pre-dated the Sky Replacement tool. Additionally, as a matter of course I’m not a big fan of making those kinds of image modifications. Nonetheless, I concluded it was warranted in this situation as the image needed it and I was not representing this as a journalistic photo.
Fortunately, I had a sky image I could use and processed it to match the overall processing of the rest of the image. Part of this included flipping it horizontally to match the light direction with the rest of the photo. Matching the light direction is a very important part of making the replacement look realistic.
Replacing The Sky
Even without the Sky Replacement tool, doing a sky replacement with a layer mask in Photoshop is a very easy task. The hard part is making the selection of the sky to remove. In this case it was very hard. The difficulty is in regard to masking around the fine detail. This image has a lot of fine detail such as bare tree branches and the roof ridge ornamentation. The selection process was very cumbersome and iterative.
Most of my selection work was done with the color image as I could use color as a differentiating item to use in selection. Due to the difficulty resulting from the fine detail I used a number of different techniques and as I got a good selection in one area, I added it to the overall sky selection. These techniques included:
- Color selection tool. I used a variety of hue, saturation and luminance adjustments along with exposure and contrast to make the sky as uniform as possible and strongly contrasted with the rest of the photo. This can result in a very strange looking photo but once you have the selection you can delete the layer as it isn’t needed; all you want is the selection.
- Using alpha channel selections and by using overlay brushes I could select around the fine detail.
- Once I good a pretty decent selection fine adjustments could be made with the Select and Mask tool using very small brushes to refine the selection.
In a few cases, I even used the pencil tool to add back parts of a branch the selection removed. As I say a very cumbersome and iterative process. On the positive side it was a great learning experience.
Matching The Sky
The final step is to double check how well the sky matches the rest of the picture. The matching I mentioned earlier, was done entirely by eye and sometimes it’s hard to get it quite right. Fortunately, the “Equalize” function in Photoshop can help.
Starting with my sky selection area I selected its inverse and then used the Equalize function. The menu settings are Image>Adjustments>Equalize then choose “Equalize entire image based on selected area”. It turns out my match by eye wasn’t too bad but I will say that the Equalize function made it much better.
Would the Sky Replacement Tool Have Made It Easier?
Since the time I did this editing, Adobe has come out with a Sky Replacement tool. From what I can see it basically automates the layer masking technique. However, the most important aspect is that it uses artificial intelligence to make the sky selection.
There is no doubt the Sky Replacement Tool is an easier process but would the selection have worked well for this image given the amount of fine detail? Based on a quick test I have to say yes. It works impressively well. If it had been available my life would have been much simpler.
Current Status
I had thought about going back one more time to try to capture it with “real” clouds. However, things have changed with the church. I recently saw a photo and the church has been restored! The last few times I was there I did notice a realtor’s sign but it wasn’t a quick sale. Now it seems someone has purchased it and has restored it. It was no longer a church in ruin.
To be honest, I have mixed feelings about it being restored. I’m certainly happy it was saved from a slow and inevitable decay into complete ruin. But at the same time, its weathering gave it a certain character and grace that restoration can’t duplicate. It wore its age well. Perhaps I’ll go back in another 100 years and it will have again become a church in ruin and I’ll be able to see the character of my old friend again.
Please Leave A Comment And Share
If you liked this post please share on Facebook and Twitter and comment below. Do you have a memorable photo due to the editing being a great learning experience? Please leave a comment in the comment box below.